The Zone Wiki
This page contains additional information and guides about The Zone FPV Simulator that are not yet fully released as part of the game.
Hidden features
Before adding a feature into the game I like to test it for a while and get a feel for it. During that time it's available as a hidden feature and can be enabled using special commands.
This allows me to quickly test lot's of new features without cluttering the game too much. Some of these features may be added as a fully fledged feature into the main game, while others may stay hidden or be removed alltogether.
Hidden features are unstable and will have bugs.
Crosshair
The Crosshair OSD element can be enabled using the command
/set crosshair 1
and disabled with
/set crosshair 0
Key / AUX switch binds
Creating a keybind
You can create keybinds for AUX switches using the bind command.
The command is structured like this:
/bind aux SWITCH_NUMBER VALUE COMMAND
The SWITCH_NUMBER for your real AUX switches starts at 4, with 0, 1, 2, 3 being your gimbals.
The VALUE can be low, mid, high.
The COMMAND can be any of the other available commands. Only one command is supported per keybind, but you can create multiple binds for a single switch.
Examples:
Save checkpoint location when setting AUX 2 to HIGH.
/bind aux 5 high saveloc
Respawn at checkpoint when setting AUX 3 to HIGH.
/bind aux 6 high loadloc
Checking what keybinds are configured
You can get a list of all configured keybinds using
/listbinds
Removing a keybind
You can remove a keybind using
/unbind BIND_ID
where BIND_ID is the # from the /listbinds command.
HELP ITS NOT WORKING!!
For the AUX switch to be detected by the game, it must be configured in your Radio's Mixer. Please double check if there is something being sent from your Radio when pressing the switch using the Channels monitor.
If that works, you can enable the Channel monitor in-game using the command
/debugger
It will show you all the channels the game is receiving and their corresponding values.
Checkpoints / Respawn
You can create a checkpoint using
/saveloc
You can respawn at the checkpoint using
/loadloc
You can respawn at the default spawn location using
/respawn
These commands are best used in combination with Keybinds
Common issues
Graphics Glitch
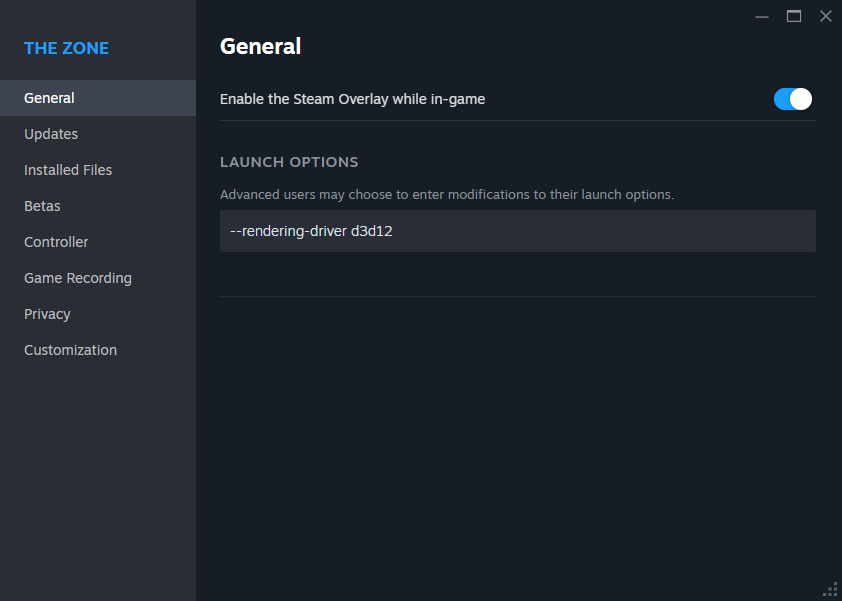
On some GPU and driver combinations (mostly AMD), you might get glitched out graphics when trying to load a map.
If this is happening to you, please add the Steam Launch setting
--rendering-driver d3d12
In your Steam library, right click on "The Zone", open Properties and add it like this
How to play a custom map from someone else
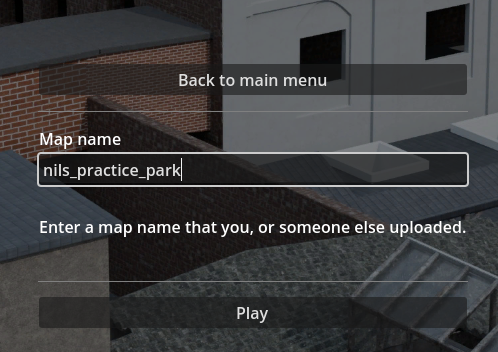
- The map creator needs to upload the map and give it a name (see steps below)
- Once uploaded, enter the same name on the "Custom lobby" screen and hit play
- Important: The names need to match, without the -123 version number.
How to create a custom map
To create a custom map, you will need to download and install the Blender 3D editor. https://www.blender.org/
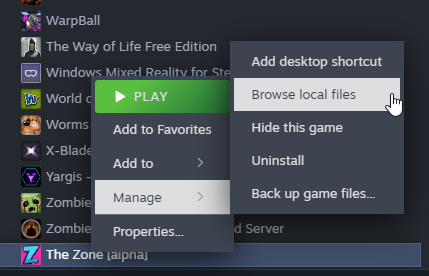
Once installed, find the game in your Steam library, right click and browse local files:
You should see a folder called "custom_map_blender_template"
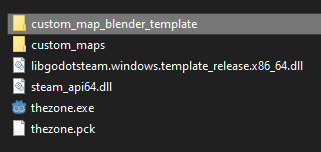
Make a copy of this folder and put it somewhere on your computer, outside of the Steam folder. If you try to edit it inside of the game files it will be overwritten by the next update.
Once copied, open the template.blend file using Blender.
The Template file contains a modified version of the texture files and a few examples of building methods that I like to use.
The textures will look very bad while editing in Blender, but they will be automatically replaced once loaded into the game.
Now you can build a map. If you already know Blender this should be straight forward, and if you're new, I made a little Blender Basics guide.
Exporting the map
Exporting the map and loading it into the game works like this:
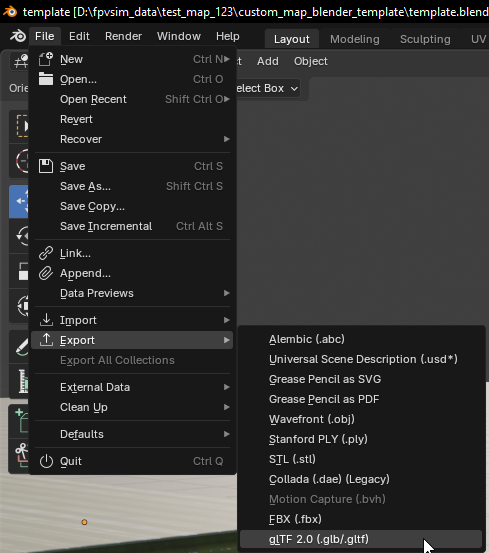
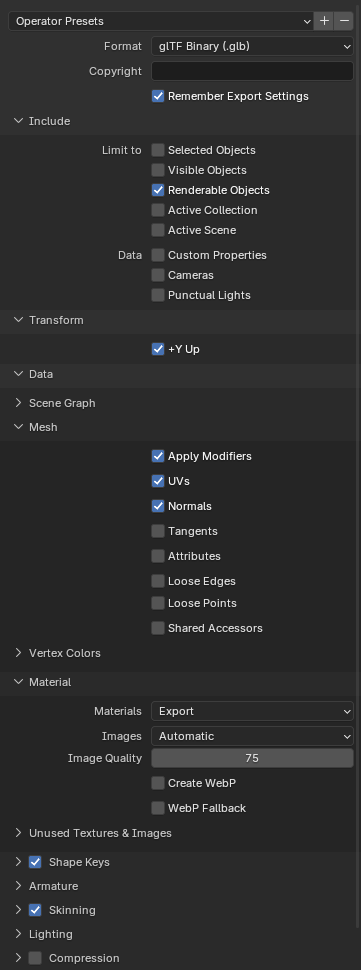
Blender: File -> Export -> glTF
Navigate to the Steam game files (on windows you can copy the path)
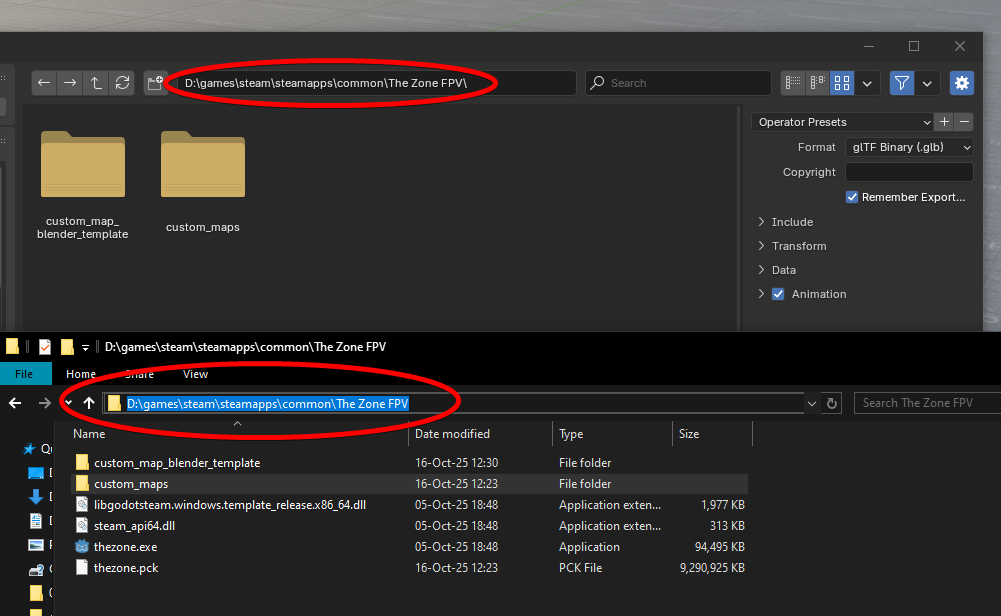
Go into the custom_maps folder
Create a new folder with your map name
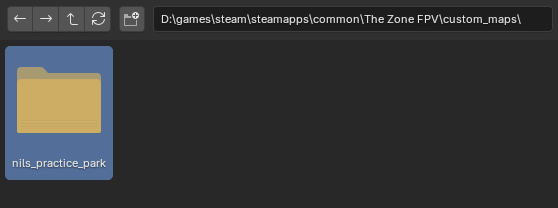
Navigate into the newly created folder
Make sure these export settings are enabled (they should be by default)
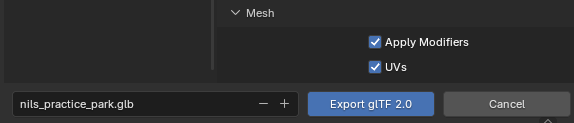
Save the file as .glb, with the exact same name as the folder you created
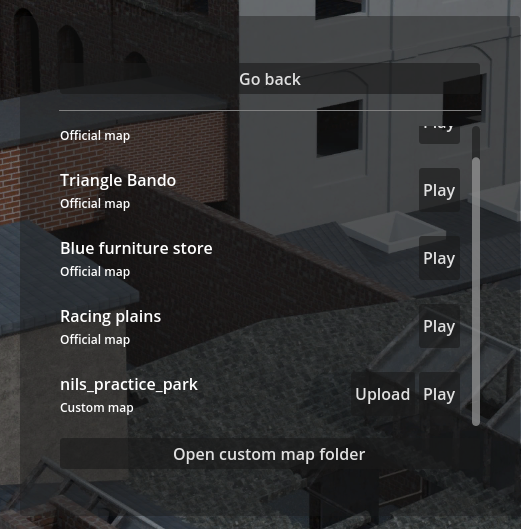
If you now open the game and go to the "Play Offline" screen, it should show up as a custom map
Now you can playtest it and make sure everything looks good, before continuing to the next step
Uploading the map
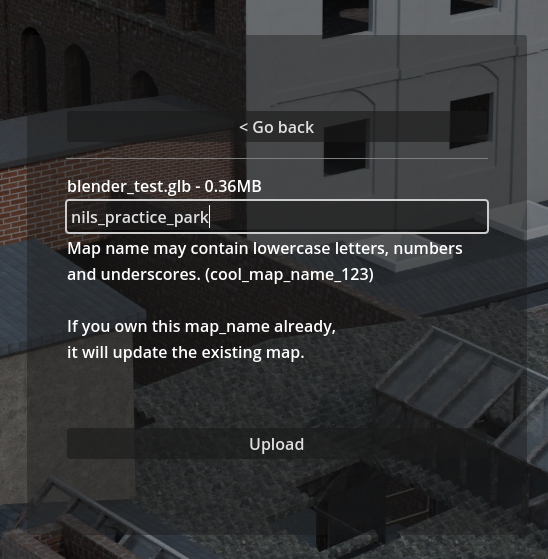
Uploading a map is very easy, just click the "Upload" button, and enter a name for your map.
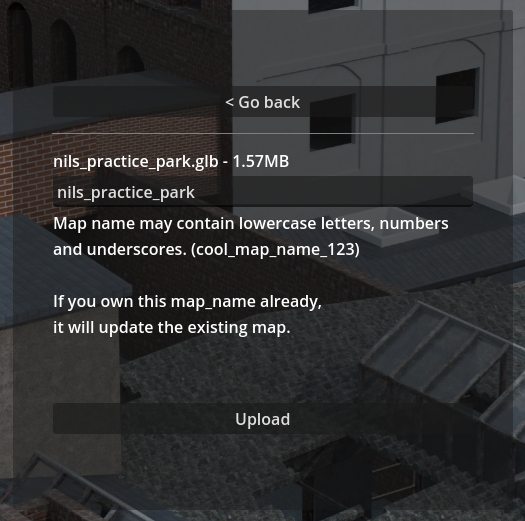
By default it will use the name of the file, but you can also rename it to something else.
Map names need to be unique and you can claim ownership of a name by being the first person to upload.
Then simply press upload at the bottom
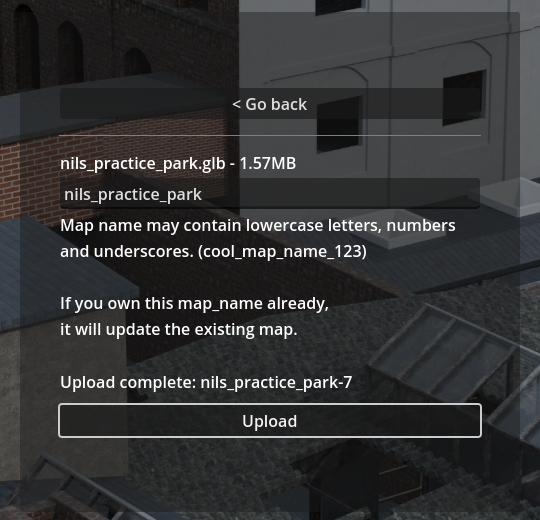
To then play the newly uploaded map online, enter the same map_name into the "Custom lobby" screen like so
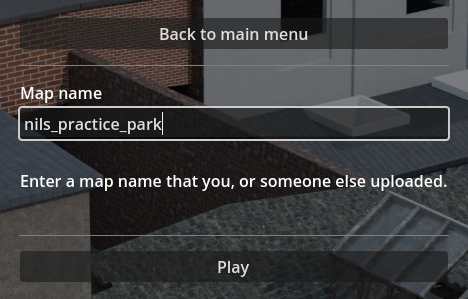
and press play.
You can also share the map_name with your friends if you want to play online together.
Getting your map featured on the main server list
If you created a high quality map, I can also then add it as an "official" map, visible in the main "Play" screen
Blender basics
Coming soon!
For now, join the discord and ask in #custom-map-help